

Are you looking to update your garage floor? Whether you’re showing off your car, creating a cohesive flow between garage and home, or transforming your garage into another room—epoxy paint is a great choice for protecting and updating your garage. Epoxy can turn any concrete floor into a brilliantly colored and finished surface free from grease and oil.
Epoxy paint is also one of the easiest concrete applications for at-home DIYers. Below we’ll go through how you can apply epoxy in just three days!
What Is Epoxy?
Epoxy is a tough, long-lasting paint made from epoxy resins. It’s painted onto concrete and functions similar to a finish. Unlike concrete stains or sealers, though, epoxy does not have a chemical reaction with the concrete. This means you can change the look of your concrete floors more easily in the future. Epoxy still has a strong adhesive quality, though, so it’s lasting and resilient.
Epoxy is resistant to grease and oil, both of which would ruin ordinary floor paint. It also tends to be more durable than other forms of paint, and it’s able to handle car traffic, salt, weather, and scraping. Plus, it comes in a variety of colors for all sorts of decors and purposes.
Choosing Epoxy
Before you apply epoxy to your floors, you need to make sure it’s suitable for your garage space. Note that if you’re applying epoxy to a new slab of concrete, you should wait at least 2 months to ensure the concrete is fully cured.
There are three main types of epoxy, classified based on the number of solids in the mixture. Epoxy is made up of a mixture of solids and liquid. The more epoxy resins (solids), the greater the “build” or thickness of the film. Generally, more epoxy in the product means a higher price.
100% solids paint is pure epoxy. There are no solvents that evaporate into the air. This is the most expensive, and it’s usually reserved for professional application.
Solvent-based paint is 40-60% epoxy. It’s the choice for most pros because it penetrates and adheres well to concrete, and it comes in a wide range of colors. However, it can be potentially toxic if not applied properly. When using solvent-based epoxy, you always need a respirator and thorough air ventilation.
Water-based epoxy is more common for DIYers. It’s made up of 40-60% solids, and it gives off no hazardous solvent fumes like solvent-based paint. Although the hold of water-based epoxy is not as long-lasting, it’s still the best option for most homeowners.
Applying Epoxy
For a 450 square foot space (average two car garage), you’ll need about 2-3 gallons of epoxy per coat. We usually recommend applying two coats for the best build.
When applying epoxy, always use proper safety protection. This includes gloves, rubber boots, and eye and lung protection. Turn off and unplug any appliances in the garage. Keep kids and animals away from the garage or driveway during application.
You should also check the weather forecast before starting the epoxy application process. You don’t want to apply epoxy on rainy days because you’ll need to open the garage door to get ventilation and fresh air after application. Moreover, you want to keep the temperature between 60 and 90 degrees F in order for the epoxy to cure and dry. In this way, it’s usually best to apply epoxy in the spring or summer.
Once you’re properly prepared, you can start the epoxy application.
-
Clean the floor.
The first day is spent entirely prepping the concrete for coating.
First, sweep away any dust, leaves, and debris. You may want to dry vacuum the area to ensure it’s clean as well.
Then, remove any grease spots, oil stains, or old paint with a cleaner and degreaser. Use a stiff-bristle brush to scrub away stains. Wipe dry with cotton rags. For larger spaces, you may want to scrub the concrete degreaser using a walk-behind power floor scrubber with a stiff brush attachment or scrubbing pads.
Then, use a wet vacuum to suck up any of the cleaning liquid. You don’t want to wash the product down the drain because it’s bad for the environment.

-
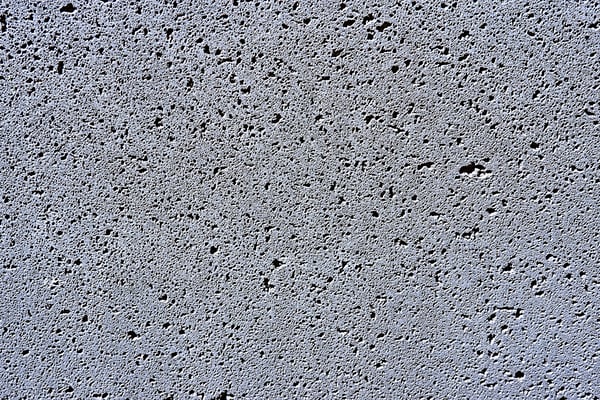
Mechanically Prepare the Concrete.
Concrete grinders such as the Onfloor 16, are available to rent nationwide. Rent a concrete grinder to properly prepare your concrete floor prior to coating it with epoxy. This will ensure proper adhesion and give the coating proper porous bonding surface. Contact Onfloor to locate a rental machine in your area.
First, follow the instructions provided with the grinding machine that you are able to rent. Most grinding machines can be operated wet or dry. If operating dry, you should rent the proper dust containment system for concrete dust. If operating wet, you must have a wet vacuum to suck up the slurry created by the process.
Choose the appropriate diamond abrasive (we suggest 25 Grit for most garage surfaces). Move the grinder over the surface until the surface is saturated with scratches and the color of the concrete changes from grey to almost white.
After you have saturated the surface with scratches, vacuum the surface well with a HEPA vacuum. You can test the surface at this point by pouring a quarter size puddle of water and dragging your finger through the middle. The water should penetrate the surface within a few minutes. If the water is penetrating well, you are ready for the next step.
-
Fill in cracks.
The following day, fill in any cracks in the concrete that are 1/4 inch or larger. Apply an epoxy crack filler, scraping the surface smooth with a plastic putty knife. Let this dry for at least four hours before applying your first coat of epoxy.
-
Mix the epoxy.
A few minutes before application, mix the epoxy you’ll need for the area. Follow the instructions on the epoxy to ensure you’ve mixed the appropriate amount of the two epoxy components. When mixing, use a drill and stir a bit to thoroughly combine. After five minutes of mixing, pour the contents into a second bucket and mix again. This will ensure the entire epoxy solution is blended.
-
“Cut in” the first coat.
Tape around the edge of the room with painting tape or masking tape. You’ll also want to cover the bottom of the garage door in painting tape so you can close the door later in the week without damaging the floor as it dries.
Using a paintbrush, brush a 4-inch strip of epoxy along the walls and perimeter. This is called a “cut in.” It creates a perimeter of the first coat to help avoid damaging the walls or misapplying the coat.
-
Apply the first coat.
After the cut in, you can apply the rest of the epoxy coat. Dip a 9-inch paint roller in the pan so that only half of the roller is covered in the paint. This prevents the epoxy from getting into your paint roller and dripping on the floor.
Roll the epoxy in a “W” pattern, backrolling to fill in the pattern. Apply in sections of 4 feet by 4 feet. Move quickly because epoxy dries fast; each section should take about 40 seconds to complete. After doing one area, go over it lightly to remove any roller marks. Keep the edge wet as you move on to the next spot to avoid any lines.
Be sure to start in the back and move out towards the garage door to avoid painting yourself into the corner. Use a cotton rag and Xylol epoxy thinner to clean up drips and spills.
Overall, the entire process for a two-car garage should take less than an hour. After application, keep the garage door open for at least four hours to allow thorough ventilation.
-
Apply the second coat.
The next day, after at least 16 hours of drying, you can apply a second coat. Applying a second coat creates a matte look that is more durable and less slippery.
Add a non-skid coating additive for the epoxy second coat to ensure your concrete is not slippery. Stir in the granules. Make sure they are fully dispersed in the solution.
Repeat steps 6 and 7 of application. Wait another 16 hours of drying before allowing any foot traffic.
-
Cure.
Allow the concrete to cure and dry for at least one week. Don’t allow parked cars or equipment in the garage for at least 7-14 days. The entire curing process will take one month.
Send us pictures of your new epoxy-painted garage floor! We look forward to seeing how it turns out!
Note: There are many different products and processes available and we always recommend that you consult with the seller of the product that you purchased for proper installation for a specific coating.

Connect with us
Recent Posts

WANT 10% OFF YOUR FIRST ORDER?

4 comments